
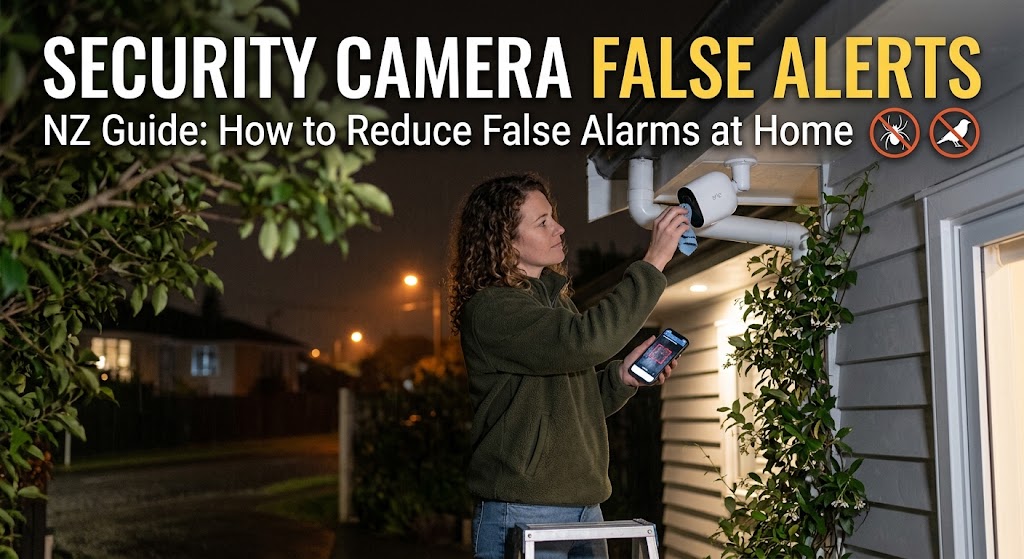
You checked your phone at lunchtime and found 61 notifications. Fifty-eight were a cabbage tree moving in the wind, two were the neighbour’s cat, and one was the courier — buried so far down the list you didn’t see it until that evening.
That’s the real cost of security camera false alerts. Not the annoyance, but the fact that a system generating noise all day quietly stops being a security system. You mute the app, and the one alert that mattered arrives silently.
This guide fixes that in the order that actually works: diagnose what’s triggering your camera first, then fix placement, then tune detection, then let AI do the filtering. It’s written for New Zealand conditions — coastal wind, summer moths, long shadows on a west-facing wall — and it covers both older motion-only cameras and modern systems with human and vehicle detection. No firmware-specific menu trees, just the settings and decisions that move the needle.
Why false alarms break a camera system
There are two ways a camera fails you. The obvious one is missing an event. The quieter one is alert fatigue: after a week of pointless notifications, you stop looking. Most people then turn notifications off, drop sensitivity to the floor, or stop reviewing footage entirely — and all three cost you coverage.
False alerts also train you to disbelieve the system. When a genuine notification arrives, your first assumption is “wind again.” The goal isn’t fewer alerts for their own sake; it’s a system where an alert means something worth looking at happened — so you look every time.
What’s actually triggering your camera
Before changing a single setting, you need to know which detection method your camera uses, because the fix is different for each.
Pixel-based motion detection compares frames and flags any block of pixels that changes beyond a threshold. It has no idea what an object is — a moth, a shadow, a spider on the lens and a burglar are all just “motion.” Most budget and older cameras work this way.
AI object detection runs the image through a model trained to recognise specific targets, usually people and vehicles, and only alerts when one is present. Rain and branches still register as motion but don’t generate a notification, because they aren’t the target class. This is what “AI human and vehicle detection” means on modern cameras and NVRs.
PIR (passive infrared) sensing looks for moving heat signatures instead of pixel changes. Better at ignoring shadows and headlights, but it can be fooled by sun-warmed surfaces and its range is shorter than the camera’s view.
Most CCTV false alarms come from a small, predictable set of causes:
| Trigger | What you’ll see in the clip | Where it usually happens |
|---|---|---|
| Wind in vegetation | Branches, flax, cabbage tree fronds, washing on the line | Anywhere with planting in frame; worse on exposed and coastal sites |
| Insects at night | White blurs streaking past, close to the lens | Cameras with infrared LEDs — moths and mosquitoes are drawn to the glow |
| Spider webs | Soft white haze or a strand pulsing in the wind | Under eaves and soffits, the classic NZ camera mount |
| Rain, hail and fog | Full-frame speckle or a milky wash | Any exterior camera in a downpour |
| Moving shadows and sun glare | The whole scene brightening or darkening | West and north-facing walls in late afternoon |
| Headlights and street traffic | Light sweeping across a driveway or fence | Cameras whose view includes the road or footpath |
| Pets and wildlife | Cats, dogs, birds, rats | Ground-level cameras and low-mounted units |
| Reflections and IR bounce | A bright wash at night, sometimes flickering | Cameras behind glass or aimed at a wall, gate or white weatherboards |
| Heat sources and appliances | Nothing visible at all | PIR cameras near heat pumps, extractor vents, BBQs |
Notice how many of these are physical, not digital. That’s why the settings-first approach so many guides take doesn’t hold up — you can’t tune your way out of a camera pointed at a driveway that fronts a busy road.
Step 1: Audit your alerts before you touch a setting
This is the step nearly every guide skips, and it’s the one that saves you a weekend of trial and error.
For three days, change nothing. Instead, open each notification and log four things: which camera, roughly what time, what actually triggered it, and whether you’d have wanted to know. A notes app is fine.
At the end you’ll have a ranked list of causes per camera — and almost always, one or two cameras generate the bulk of the noise, with one or two causes dominating each. Now you’re fixing a specific problem instead of blindly lowering sensitivity system-wide.
The times matter as much as the causes. A driveway camera that only misbehaves between 9pm and 5am has an infrared and insect problem. One that goes off between 3pm and 6pm has a sun problem. Same camera, entirely different fixes.
Step 2: Fix placement and framing first
Physical adjustments deliver the biggest reduction in security camera false alerts, and they cost nothing but a ladder and half an hour.
Get the height and angle right. Roughly 2.5 to 3 metres, tilted down so the top third of the frame isn’t sky. High enough to be out of reach, low enough to capture a recognisable face. That downward tilt removes treetops, passing headlights and the neighbour’s roofline in one move.
Keep the road out of frame. A camera that can see the footpath will alert on every car, jogger and dog walker. Reframe so your property boundary is the edge of the useful view — which also keeps you clear of the privacy issues the Office of the Privacy Commissioner has flagged in cases involving cameras overlooking neighbouring property.
Trim what’s in the frame, not just what’s in the way. Cutting back branches and tall grass inside the detection area reduces false alarms and removes hiding spots — consistent with New Zealand Police guidance on protecting your property.
Avoid reflective and bright surfaces. White weatherboards, glass doors, pools and pale fences bounce the camera’s own infrared straight back at night. Angle away, or move the camera so the surface sits outside the illuminated zone — and never mount a camera behind a window, which produces a permanent IR haze. Keep PIR-equipped cameras away from heat pump outlets and extractor vents too.
Step 3: Draw detection zones with intent
Almost every camera and NVR lets you mask parts of the frame so motion there is ignored. Most people either skip this or draw one lazy rectangle.
Do it properly:
- Exclude, don’t include. Start by masking the road, footpath, neighbouring driveway, sky, and any large area of moving planting.
- Keep zones tight to the approach paths. The gate, the front door, the path to the garage, the shed entrance. If someone can’t reach your property without crossing one of those, that’s all you need to watch.
- Draw separate zones per camera, and recheck them seasonally. A shrub outside the zone in August will be inside it by February, and the same goes for the sun angle.
If your camera supports line-crossing (tripwire) or intrusion detection rather than plain area motion, prefer those. A line across the driveway entrance triggers only when something actually crosses it in a chosen direction, which naturally ignores movement that stays put — like foliage swaying in the same spot all day.
Step 4: Tune sensitivity, object size and dwell time — in that order
The instinct is to slide sensitivity to minimum. Don’t. That’s how you end up with a camera that ignores a person in dark clothing at night.
Use the three controls together:
- Sensitivity — start at medium (around 50), then move in steps of 10 and give each step a full day and night before judging. Sensitivity governs how much change is needed to register, so cutting it too far costs you real detections in low contrast conditions.
- Minimum object size — often the single most effective setting on cameras that offer it. Setting a floor that excludes anything smaller than, say, a cat immediately eliminates insects, birds and small debris while leaving people untouched.
- Dwell time / duration — requires the target to be present for a set period (1–3 seconds is typical) before triggering. Moths, raindrops and headlight sweeps are gone in a fraction of a second; a person walking up a path is not.
Menu names vary between models and firmware versions, so check your camera’s own documentation for the exact labels. For a broader technical walkthrough of threshold and detection tuning across camera types, this complete guide to reducing false alarms in CCTV systems is a useful reference.
Step 5: Let AI security camera detection do the filtering
Placement and tuning will get you most of the way. Object detection is what closes the gap — and it’s the reason a modern system behaves so differently from one bought five years ago.
With human and vehicle detection enabled, the camera still sees the rain and the swaying flax; it just doesn’t tell you about it, because neither is a person or a vehicle. In practice, that means:
- Wind, rain, shadows and insects stop generating notifications almost entirely.
- Pets and wildlife are largely filtered out, though a large dog at close range can occasionally read as a person.
- Alerts become specific enough to act on — “person at the front door” instead of “motion detected.”
Two implementation details matter. First, check whether the AI runs on the camera or on the recorder; camera-side detection is generally more reliable because it works on the full-quality stream before compression. Second, keep recording on plain motion while restricting notifications to AI events. You want the footage of the possum; you just don’t want to be told about it. This split — record broadly, alert narrowly — is the setting most people never think to change.
ANNKE’s current PoE range, including the AC500 and AC800 series, ships with human and vehicle detection built in, and the higher-end models add perimeter protection rules like line crossing and intrusion. If you’re comparing options, the full ANNKE NZ camera and system range lists which detection features each model supports.
Step 6: Notification hygiene — the layer everyone forgets
Even a perfectly tuned camera can flood your phone if the alert layer isn’t configured.
- Set per-camera notification rules. Your street-facing camera might record 24/7 but only push alerts overnight, while the back door pushes alerts always.
- Use schedules. Alerts on an internal hallway camera between 8am and 5pm on a weekday are pure noise if the house is empty by design.
- Enable an alert interval or cooldown. This groups repeat triggers within a window into one notification instead of forty, which alone transforms how the system feels.
- Separate alert types. Push notification for people, silent recording for everything else, email or siren for perimeter crossings after midnight.
- Test it deliberately. Walk the property at night and confirm you get exactly one alert per approach — not zero, not nine.
Step 7: Night-time needs its own plan
Most remaining false alarms after tuning happen after dark, and they have three specific causes.
Insects drawn to infrared. Moths and mosquitoes gather around the IR glow and pass centimetres from the lens, filling the frame. If your camera has a spotlight or dual-light mode, switching to visible white light often reduces the swarming. ANNKE’s support team also recommends weekly cleaning with a soft brush and disabling nearby LED lighting where possible — their guide to keeping flying bugs away from security cameras covers the options, with the sensible caveat that sprays and lubricants stay off the lens and away from children and pets.
Spider webs. Under-eave mounts are spider real estate, and a single strand catching IR light triggers constantly. Wipe the housing and the area around it every few weeks — a two-minute job that removes an entire category of alerts.
Headlights and reflected IR. If a car turning into a neighbouring driveway lights up your frame, either reframe or lean on object detection — a light sweep contains no person or vehicle shape inside your zone.
A simple maintenance rhythm keeps all three under control: wipe lenses and housings monthly, clear webs and check mounting angles seasonally, trim vegetation in frame twice a year, and install firmware updates when they appear.
Basic motion detection vs AI detection: what actually changes
| Pixel motion detection | PIR motion sensing | AI human & vehicle detection | |
|---|---|---|---|
| Triggers on | Any pixel change | Moving heat signatures | Recognised people and vehicles |
| Wind and rain | Frequent false alerts | Mostly ignored | Filtered out |
| Insects at night | Very frequent | Occasional | Filtered out |
| Shadows and headlights | Frequent | Rare | Filtered out |
| Pets and wildlife | Frequent | Frequent | Mostly filtered |
| Tuning effort | High and ongoing | Moderate | Low once configured |
| Typical weakness | No object awareness | Shorter range, heat-fooled | Occasional misclassification at range or in heavy rain |
Common mistakes to avoid
- Cranking sensitivity to minimum. Fewer alerts, but you’ve also stopped detecting a person in dark clothing crossing at night.
- Turning notifications off instead of fixing the cause. The system is now a passive recorder you’ll only check after something happens.
- One setting profile for every camera. A driveway, a back gate and an internal hallway have nothing in common.
- Masking the wrong area. Blocking the whole lower half of the frame to stop pets also blocks the path a person walks up.
- Changing several settings at once. You’ll never know which one worked. One change, then observe for a full day-night cycle.
- Ignoring the lens. Dust, salt spray and cobwebs cause a surprising share of persistent alerts on coastal sites.
When to stop tuning and upgrade instead
Tuning has limits. If you’ve done the audit, fixed placement, drawn tight zones and adjusted sensitivity and you’re still getting dozens of pointless alerts a day, the constraint is pixel-based motion detection itself — not your configuration. Replace rather than tune when your cameras have no object detection and no firmware path to it, when night footage is too noisy for any detection engine to work with, or when unavoidable triggers sit in frame — a road, mature trees, a shared driveway — that reframing can’t remove.
For landlords and small business owners the calculation is sharper, because you’re not just managing your own attention. A property manager receiving hundreds of alerts across multiple sites will disregard all of them. Systems built around human and vehicle detection, with per-camera schedules and a recorder handling storage, are what make multi-site monitoring workable. If you’re specifying a new setup, browse ANNKE NZ’s PoE cameras and NVR kits and check the detection features against the triggers you identified in your audit.
One NZ-specific note for landlords: cameras at a tenanted property collect personal information, which brings the Privacy Act into play. Keep coverage to shared and exterior areas, tell tenants what’s recorded and why, and don’t point cameras at neighbouring property.
FAQs
Why does my security camera keep detecting motion when nothing is there? Pixel-based motion detection reacts to any change in the image, not to objects. Shadows moving across a wall, insects near the infrared LEDs, rain, a spider web strand, or a camera slightly loose in the wind will all register as motion even though nothing meaningful entered the scene.
How do I stop my camera alerting on rain and wind? Angle the camera down so sky and treetops are out of frame, mask areas containing moving vegetation, add a dwell time of 1–3 seconds, and set a minimum object size. If the camera supports human and vehicle detection, enable it for notifications — weather still records but stops alerting.
Does lowering motion sensitivity reduce false alerts? It does, but it also reduces genuine detections, especially at night and in low contrast conditions. Adjust it in small steps from medium, and change object size and dwell time first — they filter more precisely without blunting the camera.
Do AI security cameras really cut false alarms? Yes, substantially, because they only notify on recognised targets like people and vehicles rather than any pixel change. They aren’t perfect — heavy rain, very long distances and unusual angles can still cause misclassification — so treat AI detection as the layer that comes after good placement, not a replacement for it.
How do I keep insects and spiders off my security camera at night? Clean the housing and surrounding area with a soft brush every few weeks, switch from infrared to white-light or dual-light illumination if your model supports it, remove nearby LED lighting that attracts insects, and keep any repellent or lubricant off the lens.
Should I turn off notifications if there are too many? No — configure them instead. Use per-camera rules, schedules and an alert cooldown so repeat triggers group into one notification, and keep recording on broad motion while limiting push alerts to AI events. Muting notifications means real events arrive silently.
How often should I recheck my camera settings? Do a quick review each season. Sun angles, vegetation growth and daylight hours all change what your cameras see, so a zone that was clean in winter may sit right in front of a full shrub by summer.
The takeaway
Security camera false alerts are almost never a single-setting problem, which is why the usual advice — “lower your sensitivity” — disappoints so many people. Work through it in order: audit what’s actually triggering each camera, fix placement and framing, mask tightly, tune sensitivity alongside object size and dwell time, then let AI human and vehicle detection filter what’s left. Finish with notification rules so your phone reflects what you genuinely need to know.
Do that, and you get the outcome that matters: every alert is worth opening, so you open every alert.
If your current cameras can’t get there, explore ANNKE NZ’s range of AI-equipped PoE cameras and NVR systems — with human and vehicle detection, local recording and NZ-based support and warranty — or get in touch with the team about which setup suits your property.


 No products in the cart.